Instructions and Notes – Written by: Melonie Fitch
Notes:
- All pattern pieces are labelled with Pattern Number (see size chart for sizing) what to cut and NSA.
- NSA = No Seam Allowance. You will have to add seam allowance when you cut into your fabric. Don’t forget! My recommendation is 1/2” but 5/8” is standard for home sewing.
- Lengthening: use your judgement as to where. If you need to lengthen more than 2”, I recommend doing it at the “Lenthening/Shortening Line.” You can also split the amount and do some at the line and some at the hem. This will best be assessed on a person to person basis.
- Shortening: I would not shorten more than 1” at the lengthening/shortening line.
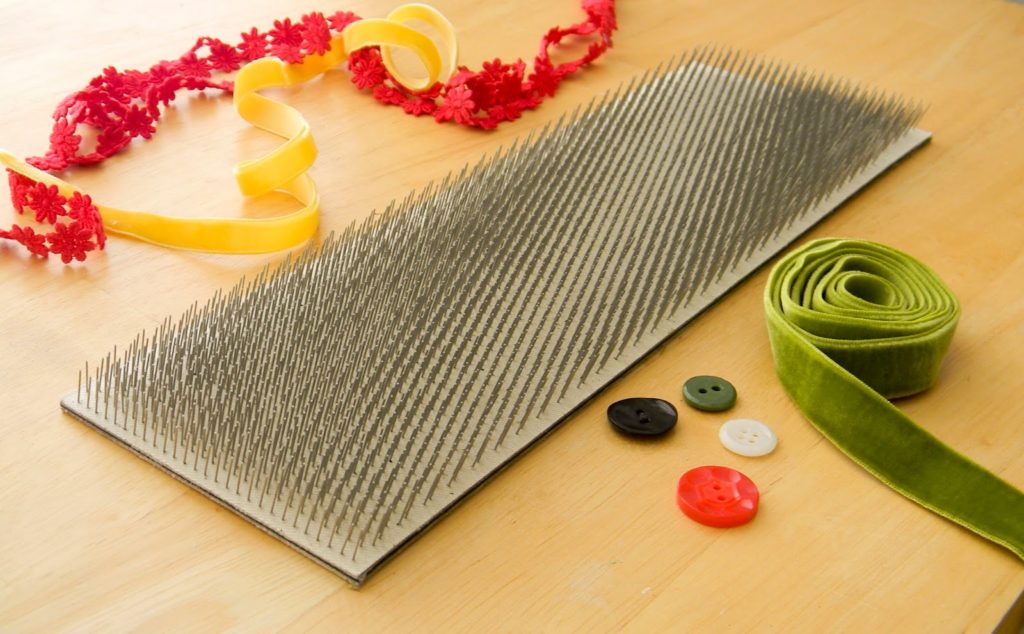
- If using velvet, be sure to use a needle board (see picture below) or plush terry cloth towel to prevent crushing the velvet when you iron/steam it.
- I love iron on interfacing, but for the glue to effectively adhere, it requires high heat and steam. For that reason, I recommend sew in interfacing for velvet.
Instructions:
- Cut out all pieces as indicated on the pattern. REMEMBER TO ADD SEAM ALLOWANCE.
- If using velvet, pay attention to nap! Cut all pieces the same direction just to be safe. (I like to mark the top of my fabric with a safety pin as I go so I never forget.)
- Sew Center Back and Shoulder Seams on Fabric and Lining Pieces.
- Press seams open.
- Depending on what type of Interfacing you’ve chosen, stay stitch or press interfacing onto collar, sleeve caps and center fronts. Make sure to stay stitch in the seam allowance but NOT on the sewing line. (Ex: if your seam allowance is ½” stay stitch at ¼”.)
- Sew collar and shoulder caps. Right sides together, OUTSIDE edges ONLY. (leave neck edge and shoulder edge open.) Clip, press and turn. Press flat. (Or lightly steam if you are using velvet.)
- Add trim to these pieces if you are using it.
- There is no need to finish the ends of the trim as it will be caught in seams. However, if your trim has a particularly open weave, you may want to stitch over the ends for extra security and/or use fray check to keep it from unravelling.
- Sleeves. Sew right sides together. Sides and bottom edges ONLY. Leave shoulder edge open. Clip, press and turn. Press/lightly steam flat. Attach trim at this point if you’re using it.
- Pin sleeve caps to sleeves, lining up shoulder seam marks. Match both to fabric (velvet) side of tabard. Stay stitch.
- You can stitch the sleeves and sleeve caps together BEFORE attaching to the tabard if you’d like.
- Sew lining to fabric, right sides together all the way around EXCEPT neckline. (Make sure to catch sleeves and sleeve caps in the shoulder seams. (While also keeping them free from all the other seams.
- Clip, press, turn. Press/steam flat.
- Stay stitch fabric and lining together at neckline.
- Attach collar.
- Sew right sides together, leaving lining of collar unattached.
- Clip neckline and press seam open.
- Stitch in the ditch/top stitch lining of collar to complete.
- Stitch trim onto body if you’re using it.
- Sew button holes. (For men, button holes go on the left side. For women, button holes go on the right side.)
- Attach buttons. Make sure threads go through ALL layers for added security.
Et voilà!